Introduction
Lab Setup
If you want to play around with Kali and particularly do some testing with the available tools, it is helpful to have a target system to test. You can download the Metasploitable VM from Rapid 7 but this will require registration and you will, for example, be asked to provide your employers name as well as a work telephone number and email address. Since I only want to play with it, find out how it works and so on, I don't really want to be giving out this type of information, especially since the download is not work-related for me. I don't know if you can get away with putting in something like a 10 minute email address here.
It is possible to get it from elsewhere, for example, on SourceForge or you can Google something like "download metasploitable vm". The zip file you download contains a vmdk file rather than an actual VM image so you can create your VM using any platform (I am using Virtual Box) and then add this disk image rather than creating a new one. For info, the default username and password are msfadmin and the ip address is 10.0.2.15 by default but of you switch to the bridged network adapter on your VM, the machine will get a local ip address, for me that is 192.168.0.25.
You can ping this from a command prompt but not from Kali Linux because the WSL doesn't permit socket operations. That will also prevent you from using some of the tools in Kali so for some purposes, you may need to find an alternative to using Kali Linux with the WSL. Personally, I don't really think there is much of a reason for doing that other than the fact that it is pretty cool to be able to run Kali Linux (and other Linux distros such as Ubuntu) directly on a Windows desktop.
Windows Subsystem for Linux
Understanding and Enabling Windows Subsystem for Linux
The WSL is a compatibility layer for Linux Binaries, it doesn't include a Linux kernel, but instead passes instructions to the Windows kernel thereby allowing us to run Linux binaries in Windows.
The WSL is intended for developers, it's not intended to provide you with a full Linux installation. Essentially, you are only getting access to a shell although with a little additional work, we can install a desktop as we will see in the next section.
Kali Linux
Installing Kali Linux on Windows 10
Kali provides some tools which Windows might identify as malware so we want to create an exception for the folder that contains Kali Linux. This is normally fairly straightforward, for example in AVG, click on menu in the top right corner.
Select Settings.
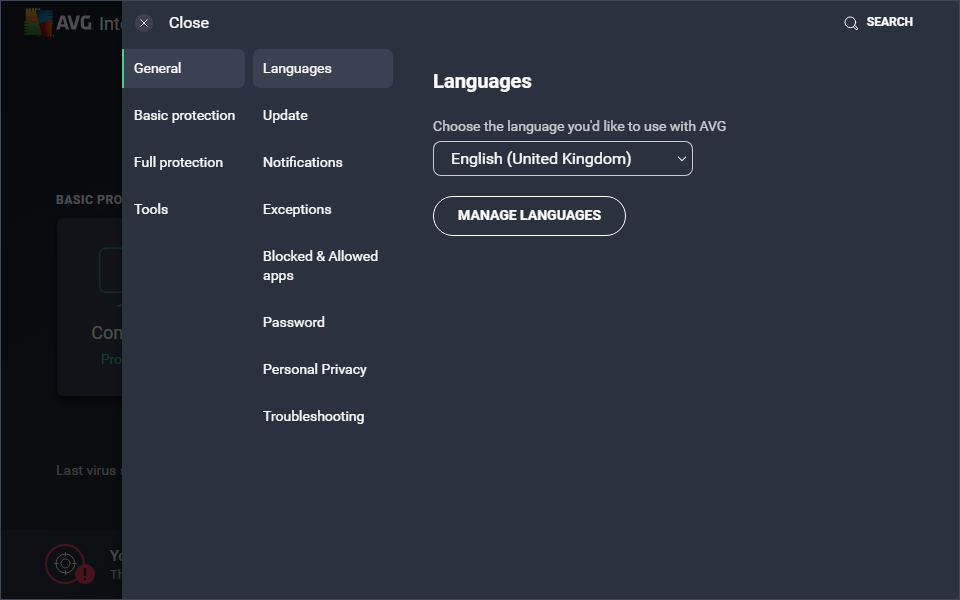
Next, click on Exceptions then Add Exception and Browse. If Kali has been installed in the default location, you should expand the C drive, then Users, your username, App Data, Local and finally packages. Take care to expand rather than select these folders or you may be creating an exception for the wrong folder. The Kali package is in a directory whose name starts with Kali so select it and click OK.
The Kali installation on Windows 10 us pretty small with a minimal amount of software, not really anything beyond a simple shell in fact. We can add other software but the repository that is available by default is the only one recommended for use with Kali. Adding other repositories can create problems so it is recommended that you don't add any.
We can get a list of tools that are available from kali.org.tools and we can install these individually. For example, if we want to install whatweb, we can do that with
sudo apt install whatweb
We can also get a list of installed packages with
sudo apt list --installed
Quick sidebar - whatweb allows us to get information about a web site or web server. You just need to type whatweb followed by a URL or ip address. For example
whatweb osztromok.com
returns this information on my website.
	└─$ whatweb osztromok.com
	http://osztromok.com [200 OK] Apache[2.4.38], Country[UNITED KINGDOM][GB], HTML5, HTTPServer[Apache/2.4.38 (Raspbian)], IP[82.2.236.221], Script[module], Title[New Website]
Notice this includes my public ip address and if I run the same command using this ip address in place of the URL, the output is (as you would probably expect) exactly the same.
We can also run the command using the actual ip address of the server which is not the same as the public address, the public address connects to my router and web traffic is forwarded to the server. This time, the output is slightly different, but not significantly so.
	└─$ whatweb 192.168.0.13
	http://192.168.0.13 [200 OK] Apache[2.4.38], Country[RESERVED][ZZ], HTML5, HTTPServer[Apache/2.4.38 (Raspbian)], IP[192.168.0.13], Script[module], Title[New Website]
We can install as many individual packages as we need, but we can also use a metapackage to install a whole set of tools, like this
sudo apt install kali-linux-large
This might be installing a lot of packages so it could take quite a while to complete but when it does, you will have access to a number of tools
Using Kali Tools
Let's get into using some Kali tools. This help us to see how they work and get us started on doing some useful stuff with them.
Nikto
Nikto will scan a webserver looking for vulnerabilities. For more information, see the Nikto page in the Kali Tools Documentation or there is a tutorial, Scanning Webservers with Nikto for vulnerabilities on the Hacking Tutorials website.
We can use Nikto with a command like this.
nikto -host 192.168.0.25
This is our Metaspolitable VM and as you might expect, nikto reveals a number of vulnerabilities. Each line of the output represents a potential website vulnerability and is probably something worth looking at. The github page for Nikto can be found here and this includes some documentation. There are also a number of online tutorials for Nikto, for example at cert.net.
John the Ripper
John the Ripper is a tool for attempting to extract passwords from a hashed file, an online tutorial for this can be found at tunnelsup.com. In order to try it out, we will need a file containing some hashed passwords and we can get these from korelogic.com. This was part of an online password cracking contest in 2012 and if you are interested, you can get more info on that at contest-2012.korelogic.com/.
The file is a bzip file (the extension is .bz) and it is archived so to unzip it, I will use Kali. To make it easier to find it in Kali, I have moved it to the root directory of the C drive and in Kali, I have navigated to this directory with
cd /mnt/c
Once there, we can get a directory listing to ensure the file is there. I want to move it over to my Kali home folder before unzipping it so that if there are any problems with the file, I have the original file handy so I have created a directory called hashedfiles in the Kali home directory with
mkdir ~/hashedfiles
Just to clarify here, when I refer to the home directory on the Kali drive, I mean the home directory for my user account which is under the name of philip.
I can now move the file over to the hashed files directory with
mv cmiyc_2012_password_hash_files.tar.bz2 ~/hashedfiles/
We can now unzip the file with the command
cp cmiyc_2012_password_hash_files.tar.bz2 ~/hashedfiles/
The directory listing for hashedfiles after extracting the zipped file is shown below.
	┌──(philip㉿DESKTOP-T1UL4RO)-[~/hashedfiles/cmiyc_2012_password_hash_files]
	└─$ ll
	total 9368
	-rw-r--r-- 1 philip philip   99578 Jul 27  2012 hashes-10.raw-md5u.txt
	-rw-r--r-- 1 philip philip  502269 Jul 27  2012 hashes-11.raw-sha1.txt
	-rw-r--r-- 1 philip philip  405963 Jul 27  2012 hashes-12.bf.txt
	-rw-r--r-- 1 philip philip  357829 Jul 27  2012 hashes-13.md5.txt
	-rw-r--r-- 1 philip philip  195937 Jul 27  2012 hashes-14.mscash.txt
	-rw-r--r-- 1 philip philip  100046 Jul 27  2012 hashes-15.mscash2.txt
	-rw-r--r-- 1 philip philip  285818 Jul 27  2012 hashes-16.mysql-sha1.txt
	-rw-r--r-- 1 philip philip  388472 Jul 27  2012 hashes-17.oracle11.txt
	-rw-r--r-- 1 philip philip  327309 Jul 27  2012 hashes-18.phps.txt
	-rw-r--r-- 1 philip philip  531180 Jul 27  2012 hashes-19.salted-sha1.txt
	-rw-r--r-- 1 philip philip 1063627 Jul 27  2012 hashes-1.sha512crypt.txt
	-rw-r--r-- 1 philip philip  745226 Jul 27  2012 hashes-2.sunmd5.txt
	-rw-r--r-- 1 philip philip  293375 Jul 27  2012 hashes-3.des.txt
	-rw-r--r-- 1 philip philip  539076 Jul 27  2012 hashes-4.dynamic_21.txt
	-rw-r--r-- 1 philip philip  334781 Jul 27  2012 hashes-5.dynamic_28.txt
	-rw-r--r-- 1 philip philip  324864 Jul 27  2012 hashes-6.nsldap.txt
	-rw-r--r-- 1 philip philip 1252756 Jul 27  2012 hashes-7.nt.txt
	-rw-r--r-- 1 philip philip  170480 Jul 27  2012 hashes-8.raw-md4.txt
	-rw-r--r-- 1 philip philip  173469 Jul 27  2012 hashes-9.raw-md5.txt
Note that the filenames give some idea of the strength of the encryption so we will take a look at one of the easiest to decode, and that is hashes-3.des.txt which is a list of usernames along with the hashed passwords. The first few of these are shown below.
	head hashes-3.des.txt
	kumarb:zg9goY0qIxinA::0:::
	millersu:81Vz9iZ6Bmbz6::0:::
	daviski:K8QOISIAXalX.::0:::
	jadams:T33f9gnZ6w7MQ::0:::
	donna.hall:2loq9qH1x1x6M::0:::
	moralech:Bjufto0s4kjpQ::0:::
	rayp:lCqiaeg1rqIcs::0:::
	luis.nelson:dCRneh2bbKDvY::0:::
	jajones:rURUNrD/6n.d6::0:::
	joana:px9k8qQ7KxDFE::0:::
Note that with John the Ripper, you can provide it with a wordlist to use or you can use its own wordlist. The command to analyse the file using the built-in worlist is
john --wordlist hashes-3.des.txt
After a few moments, we start to see a list of usernames along with their passwords. These are also stored in a hidden directory in the home folder in a file called john.pot. We can view that with a command such as
cat ~/.john/john.pot
There are a lot of other tools that Kali makes available and one of the major ones is metasploit which allows you to use a variety of exploits against a variety of targets. You can open it with the command
msfconsole
but using it is beyond the scope of this course. More information on these tools can be found in the more advanced Kali Linux and pen testing courses including the following:
• Penetration Testing Essential Training
• Penetration Testing with Metasploit
There are also a couple of relevant Learning Paths but bear in mind the fact that this is a relatively rapidly evolving field so if you are interested, it would be well worth searching on LinkedIn for relevant courses or Learning Paths when you are ready to study them.
In most cases, you will be able to do this course using the Kali installation on Windows 10, but the fact that it doesn't give you access to raw sockets so you may want to look at a different option for more advanced study which might be a VM or a live system you can boot into.
Using Graphical Tools
Many of the tools that Kali provides have graphical interfaces, but since the WSL is text only, it can be tricky to get these to run. One option is to install a desktop manager, Xfce is a good option for that. We would also need an X Server (XOrg) and an X Server on the Windows machine (XMing) so that the graphical interface can be viewed in Windows. Installing the desktop manager and X server on Kali is straightforward and we can do it with a single command.
sudo apt install xfce4 xorg
This will take a while to complete and while it is installing, you will be presented with a graphical interface of sorts allowing you to select your default language and keyboard layout.
In the meantime, we can go ahead and download the X Server for Windows from SourceForge and again, installation is pretty much standard for Windows. When it runs, you should see its icon in the system tray and there are start menu items for xming and xlaunch which allow you to configure it although we won't do that now.
We need to tell Kali what graphical display to use which you can do with
export DISPLAY=:0
We should now be able to open up a graphical tool and we will start up xeyes, which is a trivial graphical interface but it demonstrates the fact that our graphical system is working. We can do that just by typing
xeyes
You can also start up (in theory) an X desktop with the command xfce4-session but this doesn't work on my system but if it does, it should proivde a basic desktop including an Applications menu. The course video goes onto show a graphical tool called owasp-zap working. At some point, I might either get this working or use a Kali Desktop system and come back to the course video to add notes on how it works.
Managing and Resetting the Kali Environment
The Kali system is located within the Windows file system and you can navigate to it using, for example, Windows File Explorer. If you interact with the installation in this way, however, it can cause problems. For example, if you add files here, they will not be visible in Kali Linux until it is restarted and perhaps more importantly, they won't have any permissions set. A better option is to interact with the Windows file system from within Kali using /mnt/c and we saw this in action when copying over the cmiyc_2012_password_hash_files.tar.bz2 file. You can write files to or from this so it provides you with a really convenient way of transferring files between Windows and Kali Linux.
If you want to search for a file in Kali, this unified file system is actually going to make things a little harder for you and the reason for this is that the Windows system is effectively mounted on Kali Linux with /mnt being the mount point. Now, imagine we want to run a search for ant file on our Kali Linux system containing the word secrets. The normal way to do that is
find / -name "*secrets*"
That would work on our Kali system, but it is also going to search through your entire Windows system so it's going to take a lot longer and assuming you get a list of results, you may need to search through them to work out which files are on the Linux system and which are on the Windows system. You can get around that by pruning the search tree like this.
find / name "*secrets*" - print -o -path "/mnt/c" -prune
and this will prevent find from searching in any folders in /mnt/c - I would assume that if you have other drives, it will still search through them so maybe a better option would be
find / name "*secrets*" - print -o -path "/mnt" -prune
Running this with the c, the first three results are
	[philip:DESKTOP-T1UL4RO g]$  find / -name '*secrets*' -print -o -path "/mnt/c" -prune
	find: ‘/etc/polkit-1/localauthority’: Permission denied
	find: ‘/etc/ssl/private’: Permission denied
	find: ‘/mnt/g/$RECYCLE.BIN/S-1-5-21-1443535561-3938206906-1612629907-1001’: Permission denied
As you can see, the third entry there is from the g drive. I let this command run for a couple of minutes before halting it and then I tried again without the c and I got a list of results back in just a few seconds as follows:
	[philip:DESKTOP-T1UL4RO g]$  find / -name '*secrets*' -print -o -path "/mnt" -prune
	find: ‘/etc/polkit-1/localauthority’: Permission denied
	find: ‘/etc/ssl/private’: Permission denied
	find: ‘/proc/1/attr’: Permission denied
	find: ‘/proc/1/fd’: Permission denied
	find: ‘/proc/1/ns’: Permission denied
	find: ‘/proc/1/task/1/attr’: Permission denied
	find: ‘/proc/1/task/1/fd’: Permission denied
	find: ‘/proc/1/task/1/ns’: Permission denied
	find: ‘/proc/1/task/8/attr’: Permission denied
	find: ‘/proc/1/task/8/fd’: Permission denied
	find: ‘/proc/1/task/8/ns’: Permission denied
	find: ‘/proc/45/attr’: Permission denied
	find: ‘/proc/45/fd’: Permission denied
	find: ‘/proc/45/ns’: Permission denied
	find: ‘/proc/45/task/45/attr’: Permission denied
	find: ‘/proc/45/task/45/fd’: Permission denied
	find: ‘/proc/45/task/45/ns’: Permission denied
	find: ‘/proc/4853/attr’: Permission denied
	find: ‘/proc/4853/fd’: Permission denied
	find: ‘/proc/4853/ns’: Permission denied
	find: ‘/proc/4853/task/4853/attr’: Permission denied
	find: ‘/proc/4853/task/4853/fd’: Permission denied
	find: ‘/proc/4853/task/4853/ns’: Permission denied
	find: ‘/root’: Permission denied
	find: ‘/run/sudo’: Permission denied
	find: ‘/sys/kernel/debug’: Permission denied
	/usr/lib/python3.9/secrets.py
	/usr/lib/python3.9/__pycache__/secrets.cpython-39.pyc
	find: ‘/var/cache/apt/archives/partial’: Permission denied
	find: ‘/var/cache/ldconfig’: Permission denied
	find: ‘/var/lib/apt/lists/partial’: Permission denied
	find: ‘/var/lib/lightdm’: Permission denied
	find: ‘/var/lib/polkit-1’: Permission denied
	find: ‘/var/spool/cron/crontabs’: Permission denied
	find: ‘/var/spool/rsyslog’: Permission denied
We are seeing a lot of permission errors here so we might want to dispose of them with
sudo find / -name '*secrets*' -print -o -path "/mnt" -prune 2>/dev/null
Now, our list of results is
	[philip:DESKTOP-T1UL4RO g]$  sudo find sudo find / -name '*secrets*' -print -o -path "/mnt" -prune 2>/dev/null
	/usr/lib/python3.9/secrets.py
	/usr/lib/python3.9/__pycache__/secrets.cpython-39.pyc
Interestingly, I though that if we tried the same command with sudo, we would see more results, but we don't which I guess means that the folders we weren't able to search before didn't contain any matches anyway.
If you use a command like this often, you will probably want to use Ctrl+R to search for it or look for it in history.
Managing processes in our Kali on the WSL is similar to doing this in a Linux desktop environment, one major difference being that the processes also show up in the Windows Task Manager.
On our Kali system, we can use top (or htop but you may have to install it) and you can kill processes with pid. You may also need to restart the WSL in order to clean up old processes, especially if you have been using the graphical interface.
One way to do this is from a command prompt or power shell (be sure to open it as an administrator) using the command
net stop LxssManager
When you restart the WSL, all the provious processes will be gone.
While it can be very easy to break your Kali installation in Windows, it is also really easy to restore it to its initial state and you can do this by opening up Add or Remove Programs, locating Kali and clicking on the Advanced options. From there you can uninstall Kali but you can also repair or reset it. Resetting it is probably much quicker than uninstalling and then reinstalling it.